Geospatial Resources
ArcGIS Desktop: ArcMap for CSUMB Students, Staff, and Faculty
A one year license for ArcGIS Desktop: ArcMap is available to all members of the CSUMB community for installation of the software on their own personal computers. ArcGIS Pro is available as well.
ArcGIS runs in the Windows OS, but can also be run on a Macintosh or iOS device by a variety of means.
The ArcMap software installer is available by download only.
NOTE: Esri is retiring ArcMap in March 2026! See the Sunsetting ArcMap page for more information.
Authorizing ArcMap requires an authorization file which will be included with the installer download. If you already have ArcGIS installed and do not wish to update it, but only need to re-authorize it, you can download just the authorization file and skip to part D below.
Follow the instructions below to download, install and authorize the ArcGIS Desktop software.
Version 10.8.2 - ArcGIS for Desktop ArcMap software Instructions
- Prepare to install ArcGIS for Desktop
- Check the system requirements to make sure your computer has the hardware and software required for the trial.
- Download the installer zipfile
- The download is only available to CSUMB Students, Staff, and Faculty. You may need to sign in via Okta SSO to access it.
- Install ArcGIS for Desktop
- Extract the downloaded zipfile to a location on your computer where you can find it
- Run the ArcGIS_Desktop_xxxx_xxxxxx.exe file by double-clicking it
- Authorize ArcGIS for Desktop
- The Authorization wizard should run automatically after the installation completes. If it does not, run it from Windows>ArcGIS>ArcGIS Administrator (you must be signed in with Administrative rights to authorize ArcGIS)
- For software product choose "Advanced (ArcInfo) Single Use"
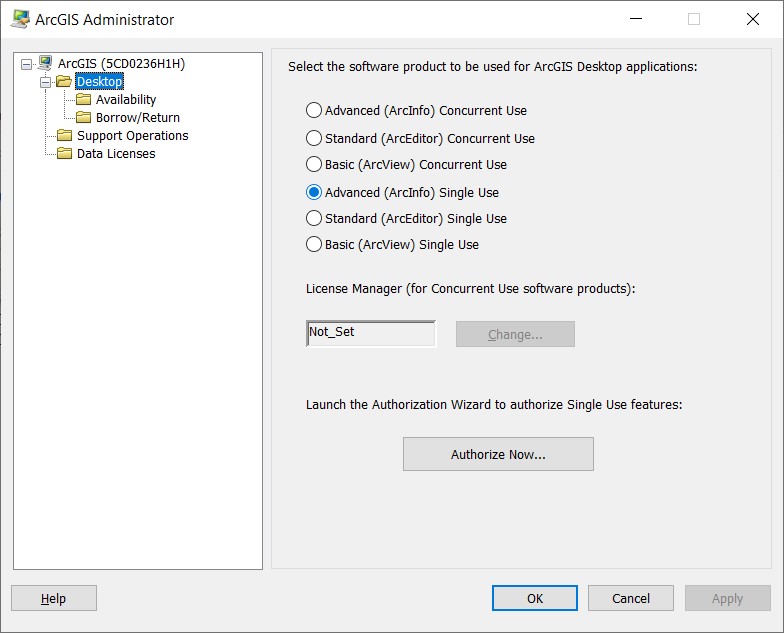
- Leave "License manager (for Concurrent Use software products)" set to "Not_Set"
- Click the "Authorize Now" button
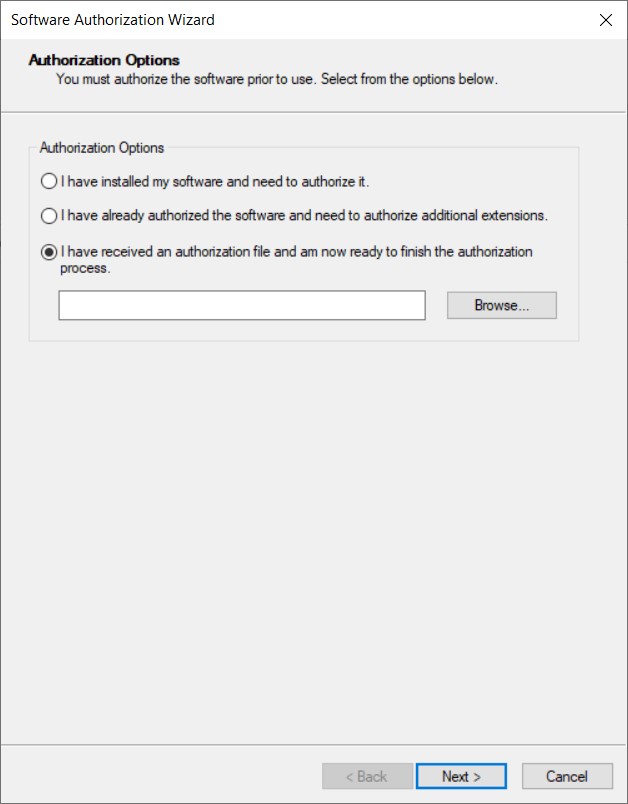
- Choose "I have received an authorization file and am now ready to finish the authorization process" and browse to the .prvc file that came with the installer
 and Click Next >
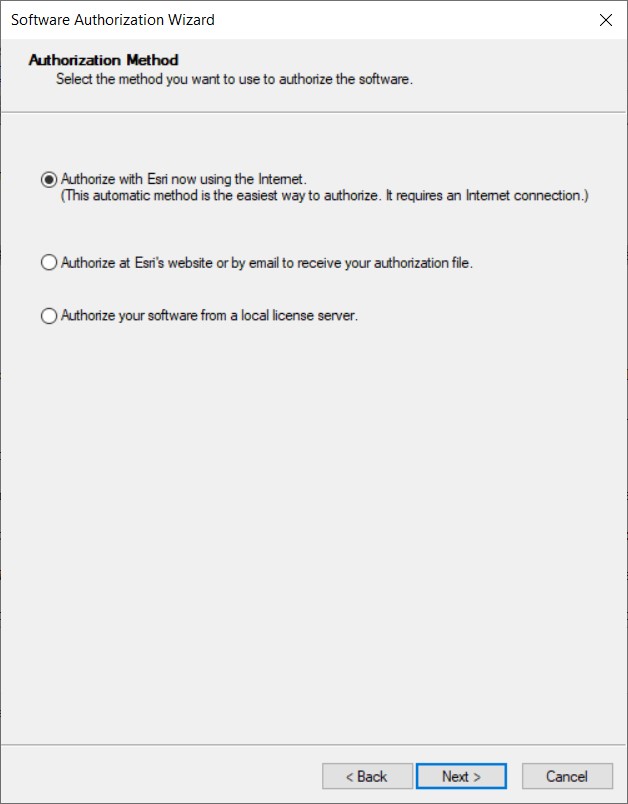
 - Choose "Authorize with Esri now using the Internet"
 and Click Next >
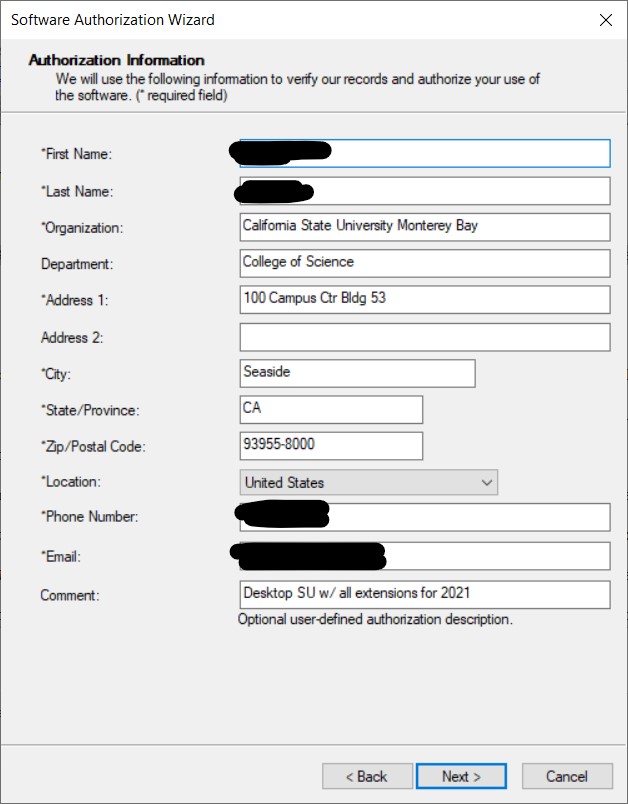
 - You may replace the existing information on the form with your own if you wish, or leave it as-is,
 and Click Next >
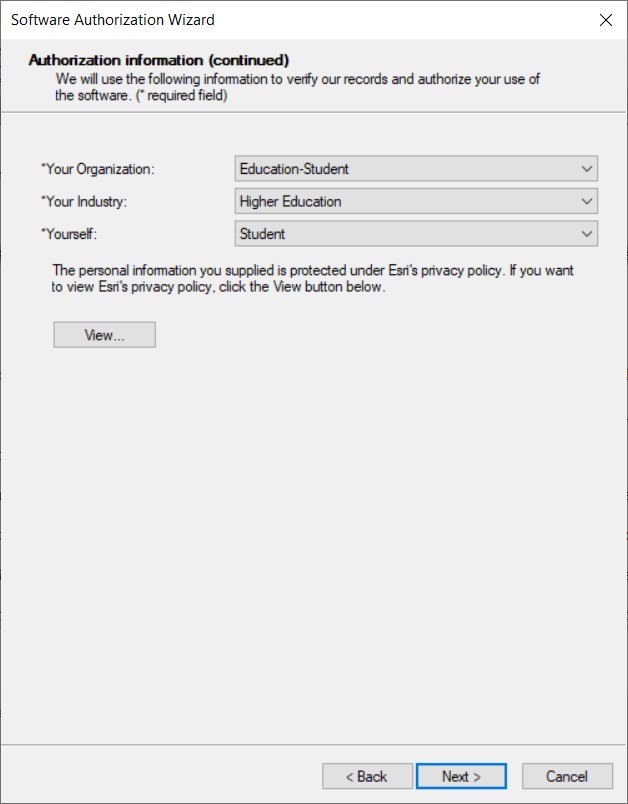
 - Choose categories for "Organization/Industry/Yourself" ("Education-Student, Higher Education, & Student", or "Education-Staff/Faculty, Higher Education, & Educator" are suggested but not required),
 and Click Next >
 - There is nothing to change on this screen, just Click Next >
- Choose "I do not wish to authorize any extensions at this time" and Click Next >
- Do not choose any extensions to evaluate and Click Next >
- The authorization will run. When it is complete, you can exit the Wizard
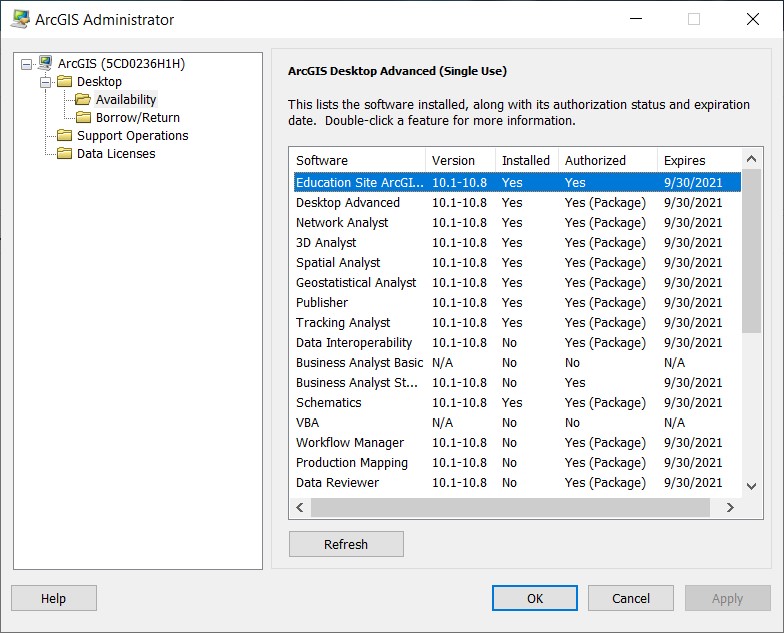
- In the ArcGIS Administrator, choose Availability in the left hand panel, and verify that all installed components are Authorized with an "Exipres" date in the future
- Exit the ArcGIS Administrator and enjoy ArcGIS Desktop: ArcMap!