Advising Tools
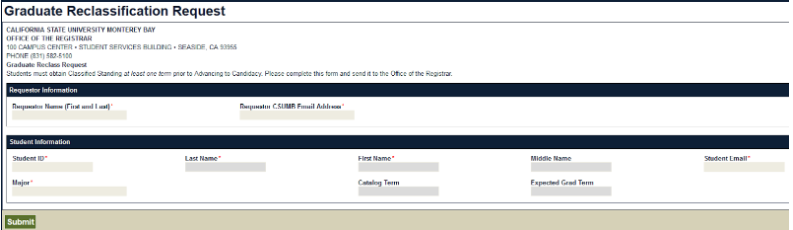
Graduate program coordinators or advisors use this form to request a status change for graduate students. Conditionally classified students can be updated to classified standing, and classified standing students can be updated to advanced to candidacy status.
Step 1
Click on Graduate Reclassification Request (you must be signed in to your Dashboard)
Requestor Information
Enter your first and last name and CSUMB email address
Student Information
- Enter the Student ID.
- Press the "Tab" or "Enter" key.
- The student's information should automatically populate in their corresponding fields.
- Verify the information on the form is correct and click on the "Submit" button.
- The form will then enter OnBase (CSUMB's imaging system) and the browser window will redirect to the Forms page.
- Completing this step means that your request has been initiated and you can now move to the processing step in OnBase. The requestor will receive an automated confirmation email confirming submission.
- Note: Step 1 can be completed by the student or department.
Step 2
OnBase Web Client: Advisor/Coordinator
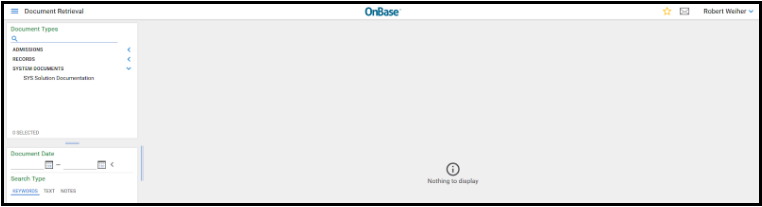
After initiating the request, an Advisor and/or Program Coordinator may open the OnBase Web Client to review and complete the workflow process. Access the OnBase Web Client
- Login as you would to the campus Dashboard
- The page will default to Document Retrieval
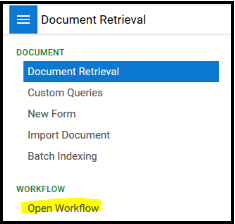
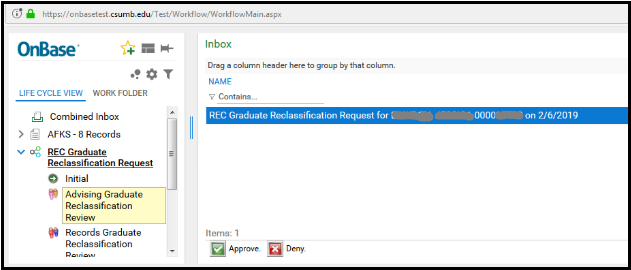
Click on the image of the three bars in the upper left corner to open a menu and select "Open Workflow". A new browser window will open.
Select "REC Graduate Reclassification Request"
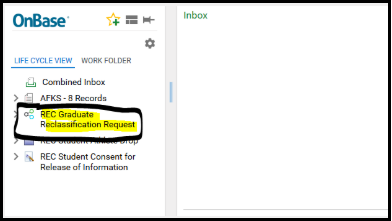
Select the "Advising Graduate Reclassification Review" work folder. This will be where your requests populate after submission (Step 1). They will display on the right in the "Inbox".
- Note: If you do not see them initially, it is due to an internal 5 minute delay between form submission and entry into the workflow process.
Step 3
Processing the Reclassification Request
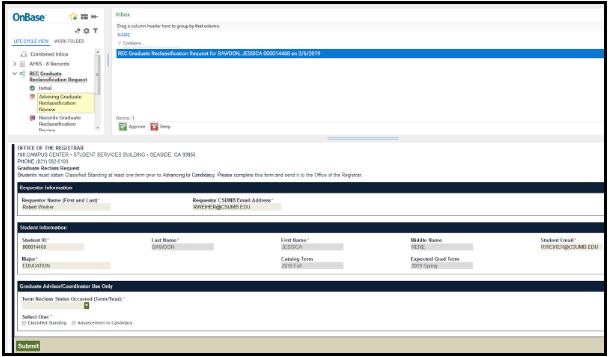
- Any online reclassification forms submitted will appear in the "Inbox" with an additional Graduate Advisor/Coordinator Use Only section.
- Select a form in the "Inbox" to process a Reclassification Request.
Select one: Classified Standing or Advancement to Candidacy
- After selecting whether the request is for Classified Standing or Advancement to Candidacy, you will need to indicate the "Term the Reclass Status Occurred".
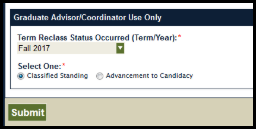
- Click on the "Submit" button.
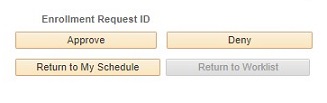
- Select Approve or Deny to move the document forward to the next step in the workflow .
Workflow Process:
Depending on how your department is set up, the approval process will differ. Below are the two approval pathways a request can follow for completion:
1. If the Advisor and Program Coordinator are different people:
Advisor > Coordinator > Graduation Counselor
2. If the Advisor and Program Coordinator are the same person:
Advisor/Coordinator > Graduation Counselor

- After the Program Coordinator approves the form, it is routed to a Graduation Counselor for review.
- After a Graduation Counselor reviews and processes the request, the student and the requestor will receive an automated confirmation email and the workflow process is complete.
Troubleshooting and Common Issues:
Graduate Reclassification Form: Student Information (Step 1)
- If the Student ID entered is for a student that is not in a Graduate-level program, a message will appear under the major:
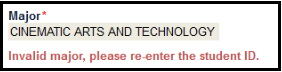
- Verify the Student ID, reenter the number, and press "Tab" or "Enter" again. The student information will refresh.
Step 1
Main Menu > Self Service > Advisor Center > Advisee Student Center.
Step 2
To look up a student, click Return to Search.

Step 3
Enter the student ID # or First and Last Name and click Search.

Step 4
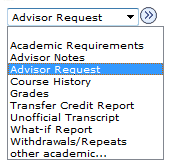
Select Advisor Request from the drop down menu and click the arrow button.

Step 5
Click Create New Request. If you need to update a previously submitted request, click the Edit button next to the request.

Step 6
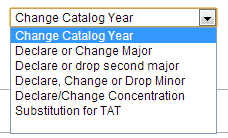
From the Request Type drop down menu, select the "Substitution for" and choose the student's major.

Step 7
Before inputting information into the request, review the student’s Academic Requirements Report. In a separate window, navigate from Main Menu>Self Service>Advisor Center>Advisee Student Center. Select Academic Requirements from the drop down menu and click the arrow button.

Step 8
Locate the requirement that you are creating the substitution for. Each requirement is labeled with a Requirement Number and Line Number. Input the R # and L # shown in parenthesis in the RQMT # / LN # field of the Advisor Request. In this example, it's R-1249/L-10. These numbers are required in order to ensure the substitution is processed correctly.

Step 9
Input the course number for the Original Course in the request. Then input the course that is being authorized as a substitution. If completed at another campus, please list the Institution name. If you have any additional comments, please write them in the Comments field.
If the authorized substitution is a course that the student may have completed more than once, such as a Special Topics course, please list the term the authorized substitution was completed as well as the full course title, unit total, and/or grade to help identify the correct substitution.
If you are submitting a substitution for an emphasis course, please list the student's emphasis in the Comments.
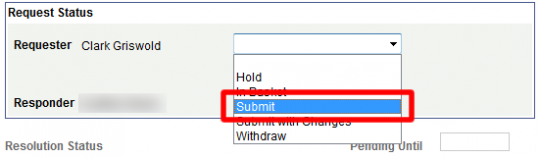
Step 10
In the Request Status box next to the Requester’s name, select Submit from the drop down menu. Then click Save at the bottom of the page. The request will now appear in the Responder’s In Basket for processing. You will receive an email notifying you of the request status once the Responder reviews it.

Managing Classes
Main Menu > Self Service > Faculty Center > Schedule

Class Roster ![]() To view and print the Class Roster, click this icon next to the desired class. To get more help on the Class Roster, visit the Class Roster help page.
To view and print the Class Roster, click this icon next to the desired class. To get more help on the Class Roster, visit the Class Roster help page.
Grade Roster ![]() To view the Grade Roster, click this icon next to the desired class. This function is accessible at end of term when grades are due. To get more help with Grade Roster, visit the Grade Roster help page.
To view the Grade Roster, click this icon next to the desired class. This function is accessible at end of term when grades are due. To get more help with Grade Roster, visit the Grade Roster help page.
Class Permissions ![]() To view permission numbers generated for a class, including the status of those numbers, click this icon next to the desired class. To get more help with Class Permissions, visit the Class Permissions help page.
To view permission numbers generated for a class, including the status of those numbers, click this icon next to the desired class. To get more help with Class Permissions, visit the Class Permissions help page.
My Teaching Schedule
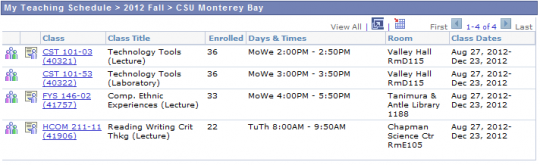
List of assigned classes (List or Weekly Schedule Views.) To get more help on the Teaching Schedule, visit the Teaching Schedule help page.
Class details
View session info and enrollment statistics. For more help on the Class details page, visit the Class Details help page.
Course Catalog Search

Click this tab to search for classes or browse the course catalog by term. For more help on the Course Catalog Search, visit the Course Catalog Search help page.
From My Schedule under Faculty Center
Click on the Class Roster icon next to the desired course.
For help navigating to the Faculty Center, visit the Faculty Center help page.


Class details
Change classes
To change classes click on the Change Class button. You will be taken back to your My Schedule page.
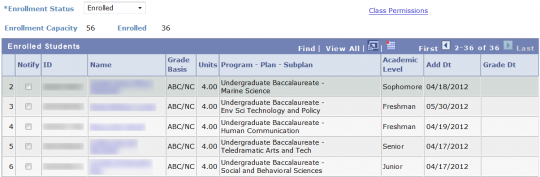
Enrollment Status
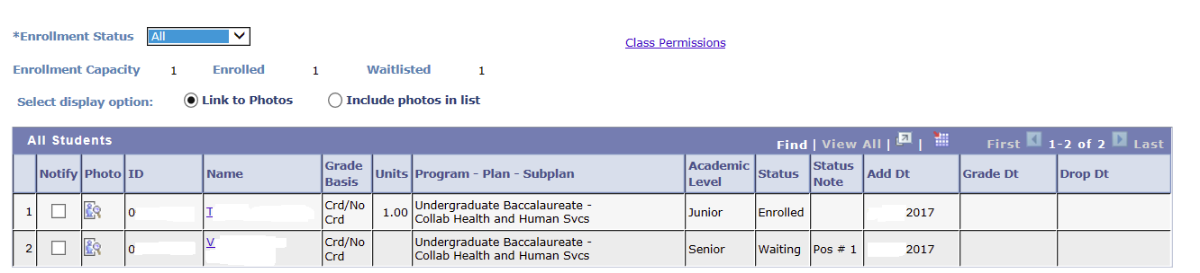
Enrollment status defaults to include all enrolled, dropped, and waiting students. You can select from the enrollment status drop down to change the class roster display. Individual student enrollment status is indicated in the status column. If the student is waitlisted in OASIS, additional status notes display to indicate their waitlist position.
Print class roster

1) To print a copy of the roster, click the Printer Friendly Version link at the bottom of the Class Roster page.
2) Select the File > Print option from the browser menu.
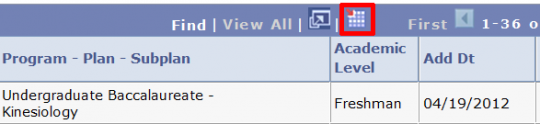
Download to Excel
1) On the Roster page Click the Download to Excel button to export the class roster into a file that can be read by spreadsheet applications like Excel.
2) A File Download dialog box will appear. This box will vary depending on which web browser you are using. Select Save and select a location to save the file.

Note: If you do not get the File Download dialog box you will need to setup your browser to allow for pop-ups from OASIS. If you haven't yet setup your browser to allow pop-ups please visit the Faculty Browser Setup help page.
Notify selected students
1) Place a check next to individual students you wish to email
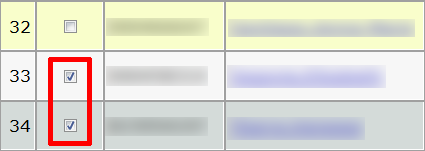
2) Click the Notify Selected Students Button

3) Type your message into the Message Text box.
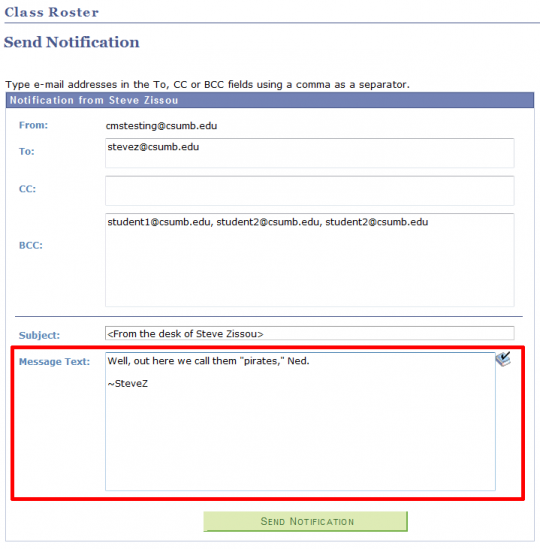
4) When ready click the Send Notification button.

Notify all students
1) Click the Notify All Students Button

2) Type your message into the Message Text box.

3) When ready to send click the Send Notification button.

FERPA

Review FERPA Information
Click on the Class Permissions icon next to the desired course.
For help navigating to the Faculty Center, visit the Faculty Center help page.
Review any permission numbers generated to allow enrollment in a class, including the status of those numbers. If status used, the student name and ID will display, along with the date used. If status not used, and expire date has not passed, the number is available for use.
Instructors may give up a student’s place in class if the student does not attend (or does not participate in on-line courses) without communicating with the instructor during the first week of courses.
Faculty that wish to report concerns about a student who has missed class, is not participating in class, or is struggling to be successful in a class, should use the academic early alert form.
To submit a faculty drop request:
Email the Registrar's Office with the course listing, class number, student name(s), and student’s ID(s). The message must be sent from your csumb email. Please include your name on the email as not all email messages clearly identify the sender.
Example message
Send to: records@csumb.edu
Subject: Faculty Drop Request
Please drop the following student from Prefix, Course Number, Section, Class Number/CRN
Jimmy Otter (0000xxxxx), (8xxxxxxxx)
For example: Please drop the following student from Math 100-01 21258
Per the Enrollment and Registration policy, there are many reasons a student may be dropped from a class, including but not limited to:
- failure to meet the prerequisite requirements;
- non-attendance (or non-participation for on-line courses) during the first week of courses in a regular semester without communicating with the instructor;
- enrolling in a class for which the student already has an Incomplete (I), Report in Progress (RP), or Report Delayed (RD) grade; or,
- enrolling in a class already successfully completed with a C or better grade.
Faculty drop requests will only be accepted until the add/drop deadline of a term. Requests submitted after the add/drop deadline for a term will not be processed.
Late add petitions submitted after the add/drop deadline require class instructor and department chair review via an electronic workflow in OASIS. An email notification will be sent when there is an item in the worklist in need of review. Instructors and department chairs can approve or deny requests by logging in to their OASIS Faculty Center and selecting Worklist.
Step 1
Login to OASIS
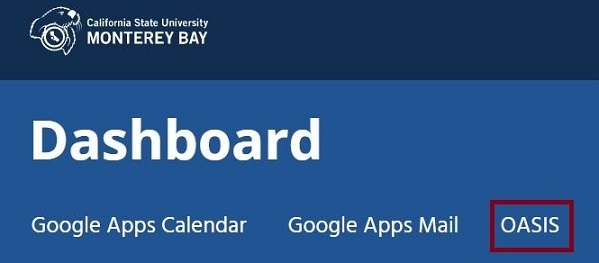
Select OASIS from the CSUMB dashboard
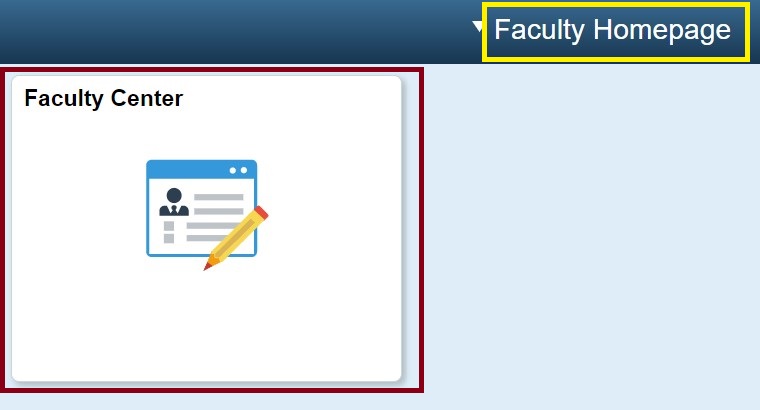
From your Faculty Homepage select Faculty Center
Step 2
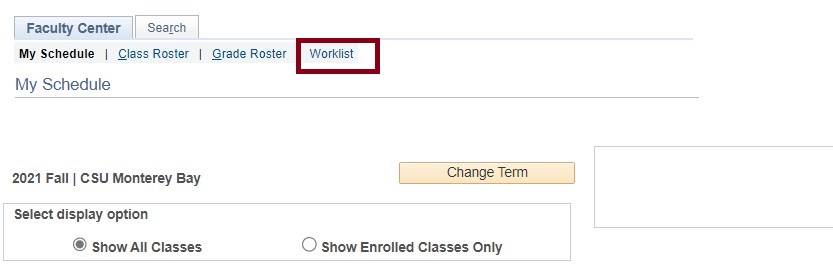
Select worklist
Select the Worklist tab in your Faculty Center
Step 3
Click the link that starts with ADD to review each request
All late add petitions that require your review will appear in your worklist. Late add petitions will have “ADD” in the beginning of the link column before the student’s name.

Step 4
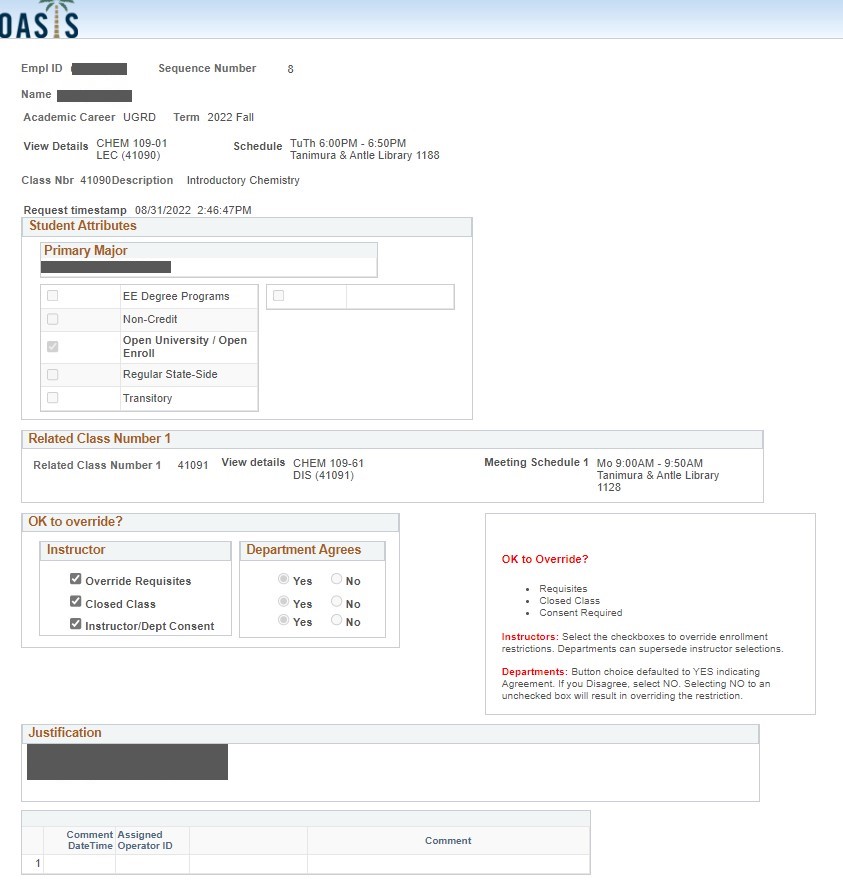
Review the petition
The class information and student information (including major and enrollment type) are included in the petition and the student’s justification/reason for the petition is at the bottom of the page. Note: If the petition is to change into a different section of a course the student is already enrolled in (called a swap), then the Swap from box will appear on the request. The Swap from box includes details about the section the student wants to drop.
Late add petitions will automatically be flagged to override certain enrollment restrictions when submitted. Instructor approval of the late add petition will override requisites, closed class, and instructor or department consent for each request.
Step 5
Approve or deny the petition
Based on department guidelines, please review and respond to the late add petition.
If you approve the request, it will be routed next for department chair and college dean approvals (depending on when the petition was submitted). If all required approvers authorize the late add, it will route to the Office of the Registrar for processing and student notification.
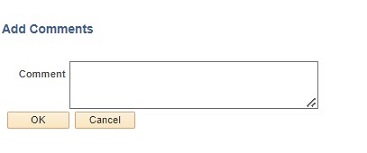
If you deny the request, you must enter a comment with information about the reason the petition was denied. Reasons to deny a request may include, for example: too late to add the class, no extenuating reasons exist, the class is full, the student has not met the requisites for enrollment, etc.
Students will be notified by the Office of the Registrar via email if their late add petition is approved or denied. Additionally, students can view their late add petition status and see any comments in OASIS.
Late add petition processing
If the instructor and the department chair /college dean offering the course all approve a late add petition, the Office of the Registrar will attempt to enroll the student to the class. If a course ADD is approved and no restrictions prevent the student from being added to the class, the request will be processed. If a course SWAP is approved, the Office of the Registrar will drop the section the student is currently enrolled in and add them to the new section. Holds or balances due may prevent the petition from being processed. The student and instructor will both receive an email notification when the student is enrolled. Also, the student will be included on the class roster on the OASIS Faculty Center.
If the instructor or the department chair/college dean deny the late add petition, the student will receive a notification that their late add petition was denied. Students can view their late add petition status and see any comments in OASIS.
Late add petitions submitted after the enrollment census date require college dean review via an electronic workflows in OASIS. An email notification will be sent when there is an item in the worklist in need of review. College Deans can approve or deny requests by logging in to their OASIS and selecting Worklist.
Step 1
Login to OASIS
Select OASIS from the CSUMB dashboard
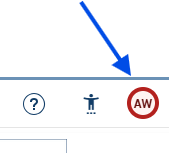
From your Staff Homepage select the compass icon
Select Menu
Step 2
Select worklist
- select Worklist
- select My Worklist – Summary view

Step 3
Click the link that starts with ADD to review each request
All late add petitions that require your review will appear in your worklist. Late add petitions will have “ADD” in the beginning of the link column before the student’s name.
Step 4
Review the petition
The class information and student information (including major and enrollment type) are included in the petition and the student’s justification/reason for the petition is at the bottom of the page. Note: If the petition is to change into a different section of a course the student is already enrolled in (called a swap), then the Swap from box will appear on the request. The Swap from box includes details about the section the student wants to drop.
Late add petitions will automatically be flagged to override certain enrollment restrictions when submitted. Instructor approval of the late add petition will override requisites, closed class, and instructor or department consent for each request.
Step 5
Approve or deny the petition
Based on department guidelines, please review and respond to the late add petition.
If you approve the petition, it will be routed to the Office of the Registrar for processing and student notification.
If you deny the request, you must enter a comment with information about the reason the petition was denied. Reasons to deny a request may include, for example: too late to add the class, no extenuating reasons exist, the class is full, the student has not met the requisites for enrollment, etc.
Students will be notified by the Office of the Registrar via email if their late add petition is approved or denied. Additionally, students can view their late add petition status and see any comments in OASIS.
Late add petition processing
If the instructor and the department chair /college dean offering the course all approve a late add petition, the Office of the Registrar will attempt to enroll the student to the class. If a course ADD is approved and no restrictions prevent the student from being added to the class, the request will be processed. If a course SWAP is approved, the Office of the Registrar will drop the section the student is currently enrolled in and add them to the new section. Holds or balances due may prevent the petition from being processed. The student and instructor will both receive an email notification when the student is enrolled. Also, the student will be included on the class roster on the OASIS Faculty Center.
If the instructor or the department chair/college dean deny the late add petition, the student will receive a notification that their late add petition was denied. Students can view their late add petition status and see any comments in OASIS.
Otter Navigate
Otter Navigate is CSUMB’s coordinated care platform designed to support student success. When faculty take attendance, submit progress reports, or raise alerts, the system notifies the student and connects them with the right support staff, such as advisors or tutors. This creates timely, transparent follow-up and provides the real-time classroom insights that make it easier to keep students on track and thriving.
How to login
Open the CSUMB Employee Dashboard.
Select OKTA Dashboard from MyApps.
Select Otter Navigate Staff/Faculty.
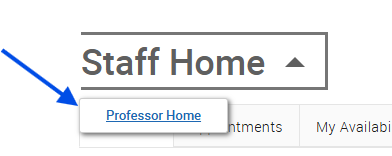
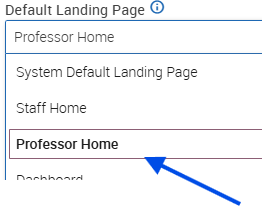
If you land on Staff Home, switch to Professor Home (▼ next to “Staff Home”).
How to submit progress reports/alerts
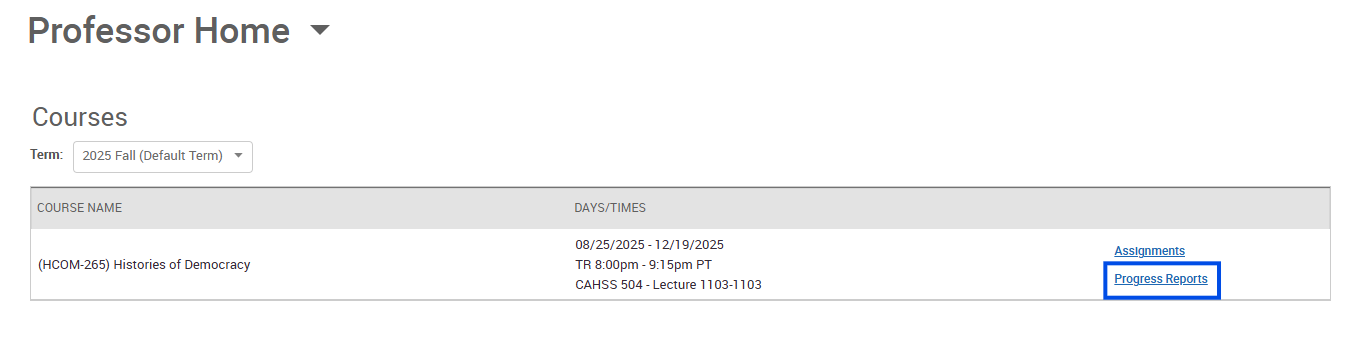
To issue an alert or complete reports on students in your class, go to the Professor Home Page and select the Progress Reports link next to the appropriate course. (You may need to adjust the term).
On the professor homepage, click Progress Reports to the right of the class for which you have student(s) that you would like to issue an alert.
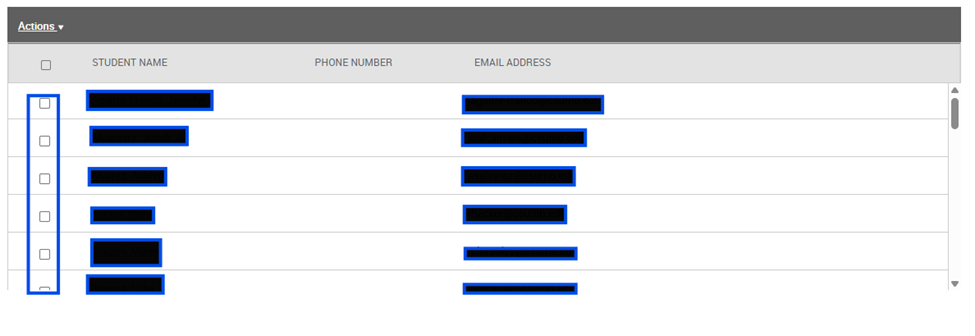
Select the student(s) you want to issue an alert for.
-
To issue an alert for one student, check the box next to their name.
-
To issue the same alert for multiple students, check the boxes next to all applicable names.
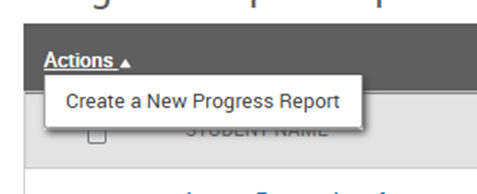
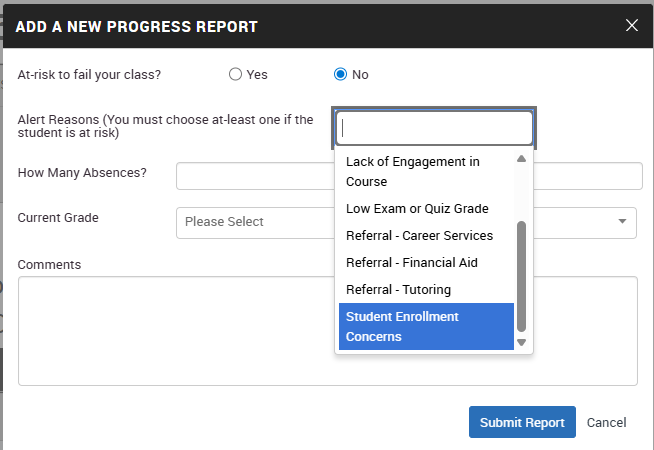
Select Actions, then Create a New Progress Report.
Indicate if you have feedback on this student by selecting Yes.
Choose the Alert Reasons for the student(s).
Optionally, you may provide additional comments that will help the care unit assist the student(s). Use the comments field to describe the behavior (e.g., “missed three labs”) rather than conclusions (“unmotivated”).
Select Submit Report.
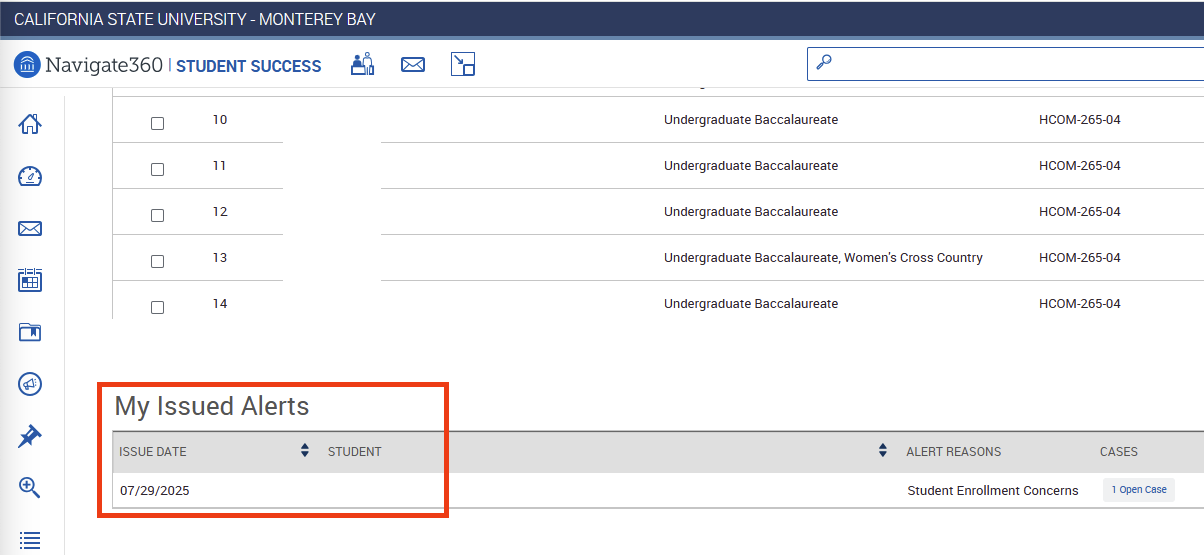
Some alerts result in a case being opened and managed by CSUMB staff. Other alerts/referrals result only in an email with instructions or advice sent to the student. In almost all instances, a notification will be sent to the student and the appropriate CSUMB staff. You can monitor your issued alerts at the bottom of the Professor Home page
How to submit an alert/referral
Staff can refer students to a care unit. Currently, there are four care units available: Career Services, Financial Aid, OtterCare and Tutoring. These referrals will send an automated message to the student letting them know a staff member has issued an alert/referral and that someone from the care unit will be reaching out to them with assistance.
Once logged in to your account, on the right side of your home screen you will see an “Actions” box. Click on “Issue an Alert/Referral.”
An “Issue an Alert” box will appear on your page. Type in the student’s name, or student ID number.
Select a Reason for the referral from the drop-down menu and select the Specific Class if appropriate.
Provide all important information in the Additional Comments box so that the care unit knows how to best serve the student.
Click Submit.
Grading
Important Notes
- OASIS grade rosters will typically become available on the last day of instruction for a term.
- Faculty who are listed as the “primary instructor” in the schedule of classes may enter and approve grades. For team taught classes, both instructors (primary and secondary) have the ability to enter and approve grades, and will need to coordinate the entry and approval of grades for the roster.
- If a course is designated as exclusively Credit/No Credit, letter grades will not be permitted.
- A last date of attendance is required when a grade of WU is assigned and optional when a grade of F is assigned. The last date of attendance defaults to a mid-point in the term and should be edited.
- If you’ve entered grades and set status to “Approved” before the grades due deadline, you can still change grades by changing status back to “Not Reviewed”, make your changes, then change the grade roster status back to “Approved”.
- Grades are visible to students in their OASIS student center after instructors enter/approve them in the grade roster and the grades are posted by the Office of the Registrar. If the grades are not yet posted and you need to make changes, set the roster back to "in review" status to edit your grade roster. Once grades are posted, any changes must be submitted as a grade change.
- If a grade roster does not appear for a class, or you receive an error message when changing a grade online, please contact records@csumb.edu.
Access Grade Roster
- You must first log into OASIS from your CSUMB Dashboard
- From the Faculty Homepage, select Faculty Center, and then My Schedule
- Verify you are viewing your schedule for the correct term. Click Change Term to select another term
- Click on the Grade Roster icon next to the course you wish to grade.


For help navigating to the Faculty Center, visit the Faculty Center help page.
Enter Grades
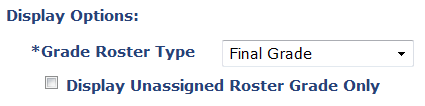
1) Make sure the Grade Roster Type is set to Final Grade
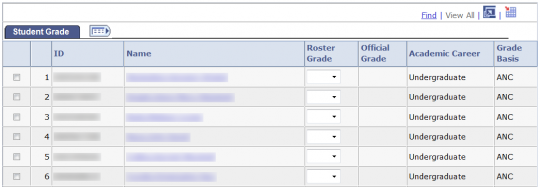
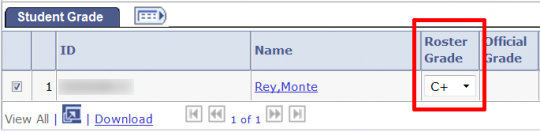
2) Enter Grades next to each student using the drop down box under Roster Grade
3) Click Save periodically as you enter grades. Be sure to click Save when have finished entering all grades.

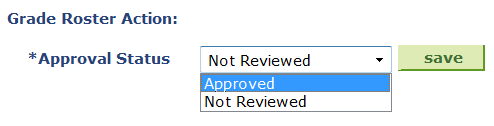
4) When you have finished entering all grades change the Grade Roster Action - Approval Status to Approved and click Save.
Change Grades
The request grade change link is only available after the grade rosters are posted. Grades should only be changed to correct a clerical or data entry error, replace a RD grade, update RP or I grades if work has been completed, or informally resolve a student inquiry. If you need to extend an incomplete grade, submit an Incomplete Extension form. (Form is available in the departments or can be requested from Registrar’s Office).
1) Navigate to the grade roster and click the “Request Grade Change” link.

The Request Grade Change link shows only on rosters that have been posted.
2) Locate grade to be changed and click the “Submit Request” button.
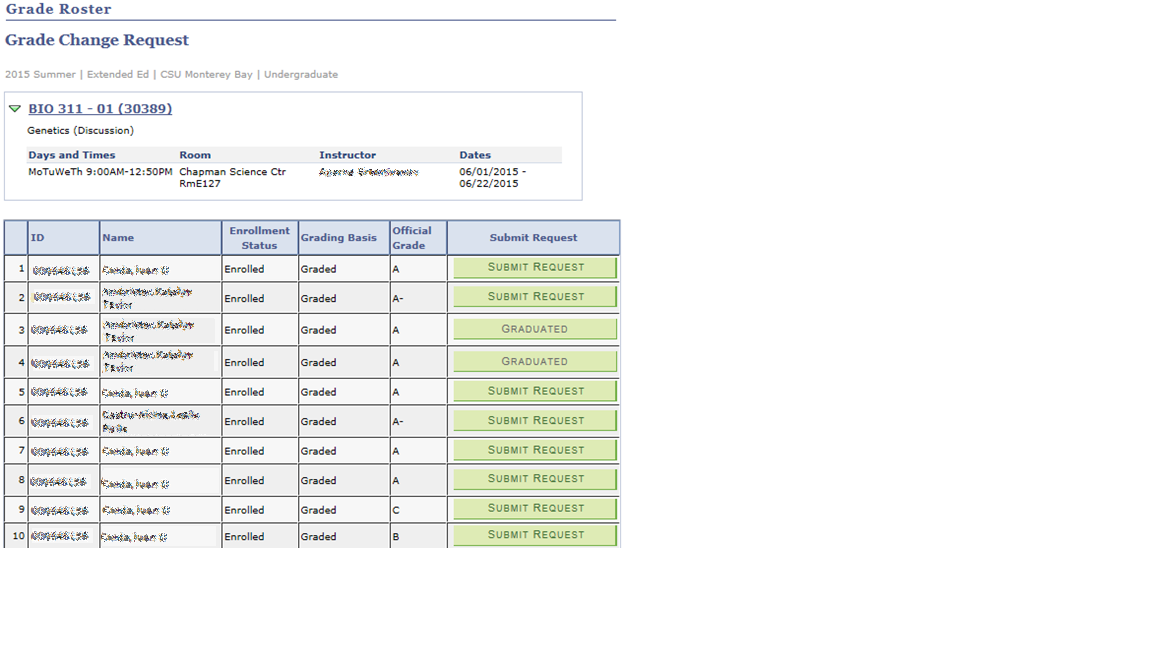
To the right of the official grade will be a column with information about each student. If the student has graduated, it will be indicated and the grade change cannot be requested. If the student received a W, it will indicate administrative grade, which cannot be changed. If the grade change has already been requested, the status will indicate In Review. Click Submit request to request a grade change.
3) Complete the grade change request page and click the “Submit” button.

Select grade change reason: Grade change reason is limited by previous grade. For example, the students previous is A, so the only grade change reason available is correction of grade.
Select new grade: Grade options are limited to those that are allowed for the students grading mode. For example, if the student received a letter grade, their grade can only be changed to a letter grade.
Enter justification: This is not a required field. Please remember that this becomes part of the student record upon entry, and only enter information that is required to submit the grade change.
Click Submit: You will receive a message that the request has been submitted successfully.
Depending on the timeframe of the grade change, it will be sent directly to the Registrar’s office for processing, or to the College Dean and possibly the Provost for additional review. Once approved by the persons required, it will route to the Registrar for processing.
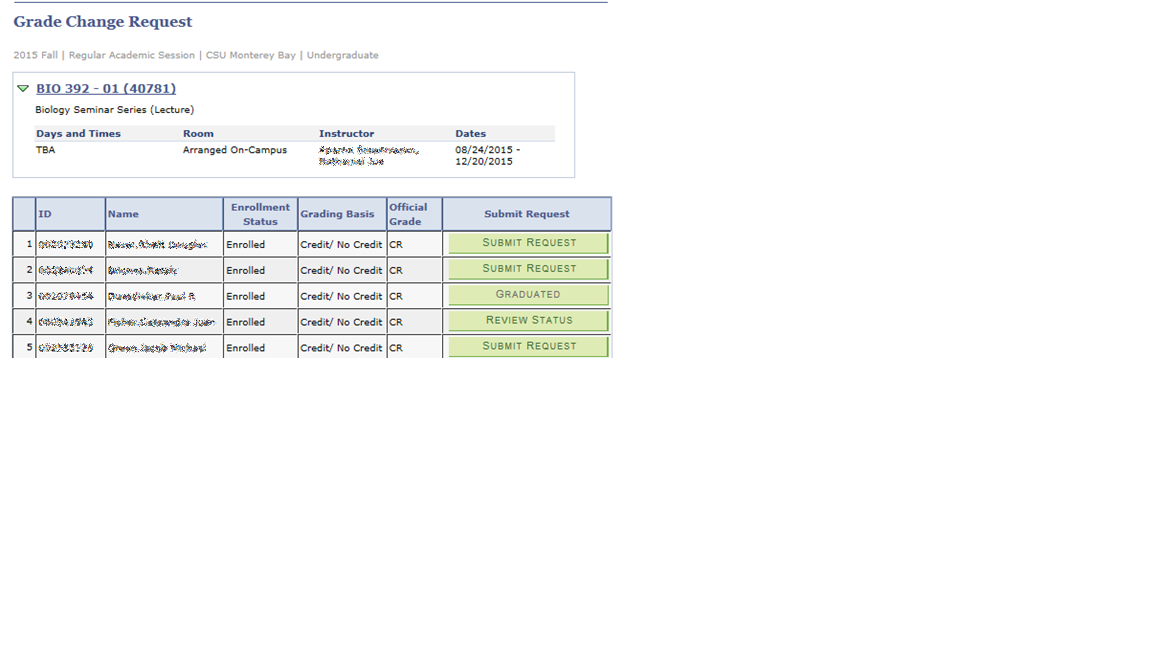
4) View the status of a submitted request or cancel a request.
Upon final approval or deny, you will receive an email that the grade change has been processed. You can also log in anytime to check the status of the grade change request.
Navigate to the grade roster and select the Request Grade Change link. Click Review Status for the student who has a grade change pending.
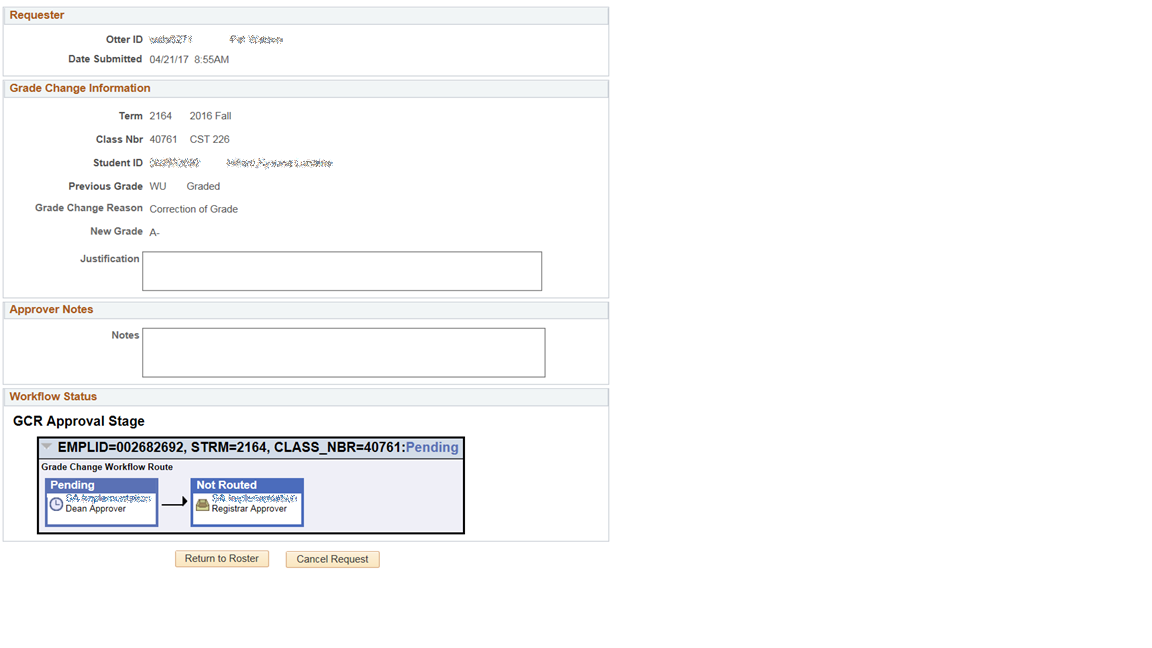
You will see the information that was submitted, along with a visual of the workflow status.
Cancel Request: Cancelling a request terminates processing and enables you to re-enter grade change information, in case of administrative error. As long as the request is ‘pending’ and has not been processed by the Registrar’s office, you may cancel the request.
Paper Grade Change Forms Still Required When
- An electronic request has already been processed for a particular student & class number
- A student was not on the grade roster at the time that grades were posted for the class (i.e. late add)
- A students’ final grade roster status is not equal to posted, even if they are listed on the grade roster
- The Instructor of record does not have access to OASIS or no longer teaches at the university
- The Dept Chair/Dean is submitting a grade change request on behalf of the instructor
Other Grade Roster Functions
Bulk Grade Assignment
You can assign multiple students the same grade at the same time. This feature is here to help making grading large classes faster.
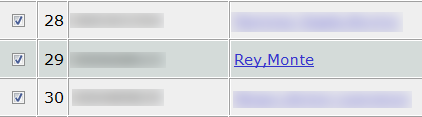
1) Check the box in front of the students ID number.

2) Once you have checked the students you wish to assign the same grade select the grade in the box to the left of "Add this grade to selected Students".

3) Once the grade has been selected click on the "Add this grade to selected students" button.
4) Click Save periodically as you enter grades. Be sure to click Save when have finished entering all grades.
5) When you have finished entering all grades change the Grade Roster Action status to Approved and click Save.

Note: Before moving onto the next group of students click the "Clear All" link.
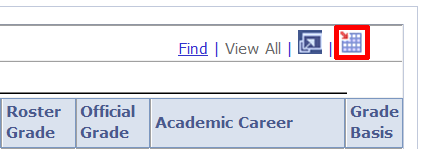
Download to Excel
1) On the Grade Roster page Click the Download to Excel button to export the grade roster into a file that can be read by spreadsheet applications like Excel.
2) A File Download dialog box will appear. This box will vary depending on which web browser you are using. Select Save and select a location to save the file.
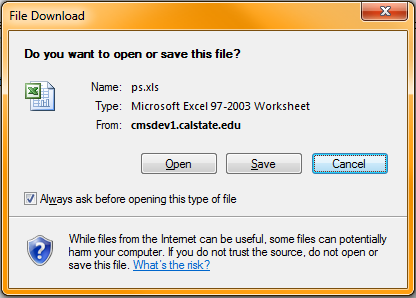
Note: If you do not get the File Download dialog box you will need to setup your browser to allow for pop-ups from OASIS. If you haven't yet setup your browser to allow pop-ups please visit the Faculty Browser setup help page.
Printer friendly version
1) To print a copy of the roster, click the Printer Friendly Version link at the bottom of the Class Roster page.

2) Select the File > Print option from the browser menu.
Change Class

To change classes click on the Change Class button. You will be taken back to your My Schedule page.
Notify Students
1) Place a check next to individual students you wish to email
2) Click the Notify Selected Students Button
3) Type your message into the Message Text box.
4) When ready click the Send Notification button.
Notify All Students
1) Click the Notify All Students Button
2) Type your message into the Message Text box.

3) When ready to send click the Send Notification button.
In certain circumstances, you may ask your instructor to assign you an "incomplete" grade. You and your instructor will complete an Incomplete Grade Contract that outlines how you will complete the requirements for the class in a given timeframe (the timeframe cannot be longer than one year).
An extension of the one-year time limit may be granted by the faculty member for contingencies such as intervening military service or other serious and compelling reasons. Faculty members approving an extension shall submit an Incomplete Extension request form (available in the departments) to the Office of the Registrar.
Students may not re-enroll in a class in which a grade of "I" (Incomplete) is currently assigned.
The grade "I" will automatically be converted to "IC" if the instructor does not submit a grade change for the class in question before the 1-year time limit is reached, or there is no approved extension of the time frame for the Incomplete grade.
More information about incomplete grades can be found in the Enrollment and Registration policy.
What is in I grade?
An incomplete grade indicates that a portion of class requirements were not completed due to unforeseen reasons and there is still the possibility of earning credit for the course.
How does the I grade work?
Students may ask instructors to assign an "incomplete" grade, and instructors may approve the request, when the following criteria apply:
- The student has satisfactorily completed 75% of the course requirements, as determined by the instructor
- The student has experienced unforeseen and extenuating circumstances that will prevent completion of the remaining course requirements by the end of the term
- The student requests the incomplete no later than the last day of instruction for the course and is making satisfactory progress in the course at the time of the request
Incomplete grades cannot be assigned if it is necessary for the student to attend a major portion of the class when it is next offered. Students may not re-enroll in a class in which a grade of "I" (Incomplete) is currently assigned, and if enrolled, they may be dropped from a class in which they already have an incomplete grade.
If requested by the student and authorized by the instructor, an incomplete grade provides students an extended period of time to complete course requirements.
How does a student ask for an I grade?
- The student contacts the instructor before the last day of classes for the term to request an incomplete grade.
- If the instructor approves the student’s request, the student and instructor must complete an incomplete grade contract form. This form should outline how the student will fulfill the requirements for the class by a given deadline.
- The student and the instructor should both maintain a copy of the incomplete grade contract.
How does an instructor assign an I grade?
- The instructor receives a student’s request for an incomplete grade no later than the last day of classes for the term.
- If the instructor approves the student’s request, the student and instructor must complete an incomplete grade contract form. This form should outline how the student will fulfill the requirements for the class by a given deadline.
- The instructor and the student should both maintain a copy of the incomplete grade contract.
- The instructor assigns the student’s incomplete grade in their OASIS grade roster.
- The instructor files a copy of the incomplete grade contract with their department office.
How does an instructor assign a final grade when the outstanding work is completed?
- The student completes and submits all required work to the instructor before the deadline stated in the incomplete grade contract.
- The instructor makes note of the date the work was completed and evaluates the student’s work.
- The instructor submits the student's final grade by requesting a grade change in their OASIS grade roster and enters the work completed by date.
- The student verifies their final grade in OASIS after it is submitted by the instructor.
Considerations for incomplete grades
- Incomplete grades cannot be assigned if it is necessary for the student to attend a major portion of the class when it is next offered.
- Students may not re-enroll in a class in which a grade of "I" (Incomplete) is currently assigned. If enrolled, they may be dropped from a class in which they already have an incomplete grade.
- Students cannot graduate with incomplete grades. Students receiving incomplete grades in their last term of enrollment must change their graduation to a future term so that the degree may be conferred in the term when the coursework will be completed.
- The grade "I" will automatically be converted to "IC" if the instructor does not submit a grade change for the class in question before the 1-year time limit is reached, or there is no approved extension of the time frame for the Incomplete grade. An IC (incomplete charged) is equivalent to an F for gpa computation.
Review your Academic Requirements Report
The OASIS Student Academic Requirements Report helps undergraduate students determine if they have met General Education (GE) requirements, major requirements, university requirements, and other campus and state requirements. Beginning Fall 2018, the Academic Requirements Report is available to graduate students.
This report is useful for you and your advisor to keep track of your progress towards graduation. When you apply to graduate, the Office of the Registrar will complete a graduation evaluation, based on your Academic Requirements Report, which will officially determine if you have met all your degree requirements.
How to view your report
You may access your Academic Requirements Report by logging into OASIS from your dashboard. In OASIS, click on Self Service, then select Student Center. Select Academic Requirements from the drop down menu and click the arrow button.
Understanding the report
We recommended that you review your report with a staff advisor in Center for Advising, Career and Student Success.
If you completed General Education requirements with transfer GE courses, AP or IB tests, those may be reflected here as TRAN courses (or articulated coursework), provided you earned a minimum passing grade, minimum test scores for tests, and your transfer and/or test credit has been posted to your record.
Academic Standing and CSUMB GPA fields are updated at end of term only and do not change. Refer to unofficial transcript for real-time GPA calculation.
Courses in progress are included but must earn the required passing grade in order to fulfill requirements. Grades of "I" (Incomplete) are considered In Progress grades and may be listed as courses which have met requirements. The system operates under the assumption that you will complete courses with grades of "I" within the appropriate time frame. If courses with grades of "I" are not completed and lapse to a grade of "IC" the requirement area will not be fulfilled.
Advisor Requests allow you to request changes to a student's major, concentration, or catalog year. You may also request course substitutions.
From the Advisee Student Center, in the Academics Section, Use the Drop Down Menu to select Advisor Request and click the GO button.
If you need help navigating to the Advisee Student Center, visit the Advisee Student Center help page.
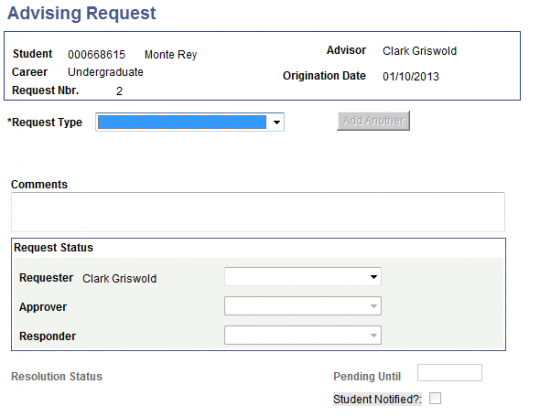
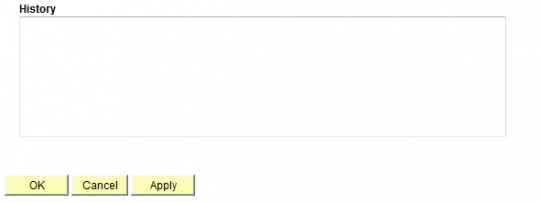
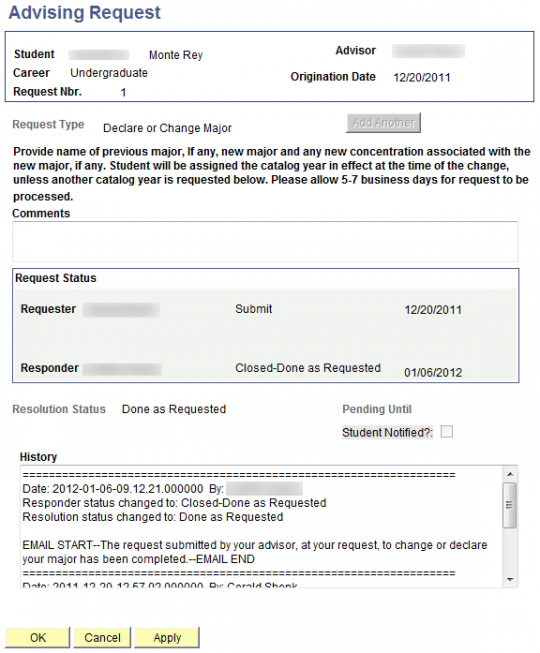
Request summary screen

New request screen
Request types
Change major
1) Click "Create New Request".
2) Select Declare or Change Major from the drop down menu.
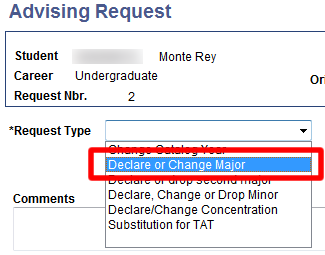
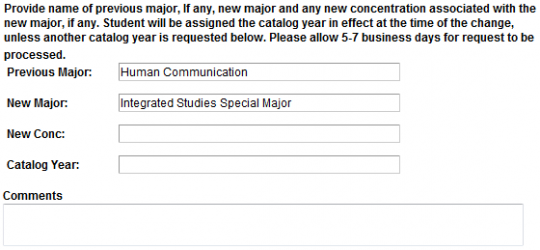
3) Enter the students previous major and the requested new major.
4) Select Submit.
5) Click OK.

6) The student will be notified by the Registrar's office when the change has been completed.
Change catalog year
1) Click "Create New Request"
2) Select "Change Catalog Year" from the Request Type drop down menu.
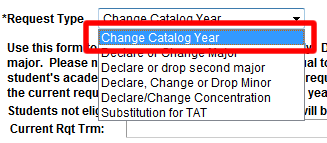
3) Enter the Previous Catalog Year and the New Catalog Year.
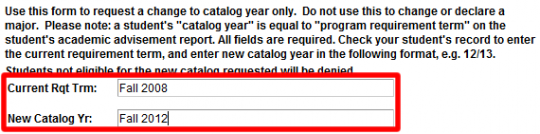
4) Select Submit from the drop down menu.
5) Click OK.
6) The student will be notified by the Registrar's office when the change has been completed.
Review request
1) Click on the Edit link in the Edit Request box.

2) Review the status.
Student academic records are protected by the Family Educational Rights and Privacy Act (FERPA). If you want to share your records with your parents, guardians, or another designated third party, you must submit the electronic Authorize to Release form in OASIS.
By completing the Authorize to Release form in OASIS, you can designate one or more trusted persons—your third-party designee(s)—to receive information about your records when they contact the University.
How to authorize release of records
- Only you, the student, can legally complete this authorization.
- Your authorization is effective starting with the date you execute it.
- You may revoke authorization for a third party at any time.
- You can authorize specific CSUMB offices to share your information with third-party designee(s).
- Authorizing one office to release records does not authorize the other offices.
Step 1: Login to your OASIS student center
From the dashboard, select OASIS
Step 5: Tell your designees how to access your records
Before CSUMB can release your student information to your third-party designee(s), they will need to:
- Identify themselves
- Provide your student name and 9-digit student ID number
- Provide their access code
Do not share this information with anyone other than your authorized designee!