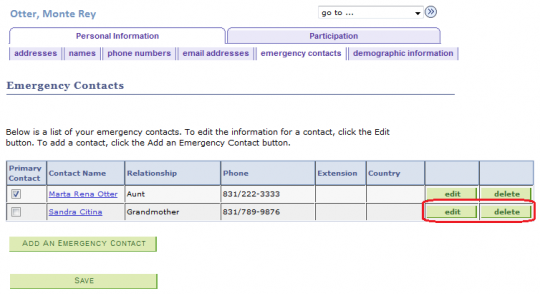
View and Update Emergency Contacts
Step 1
Navigation: Main Menu > Self-Service > Campus Personal Information > Emergency Contacts.
Step 2
To add an emergency contact click the Add An Emergency Contact button.
Step 3
Enter a contact name and choose the type of relationship from the drop-down menu.
Step 4
If the address of your emergency contact is the same as yours check the box "Same Address as Individual" and choose the address type accordingly from the drop-down menu.
Step 5
If the address of your emergency contact is NOT the same as yours click the Edit icon to edit/add the address of the new emergency contact.
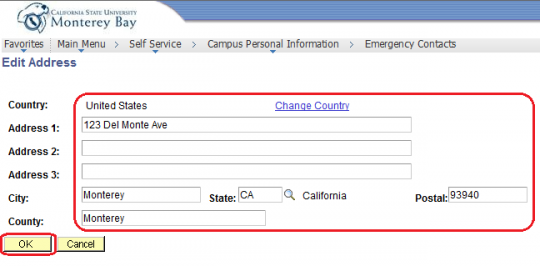
Step 6
Enter the address information of the new emergency contact and click the OK button.
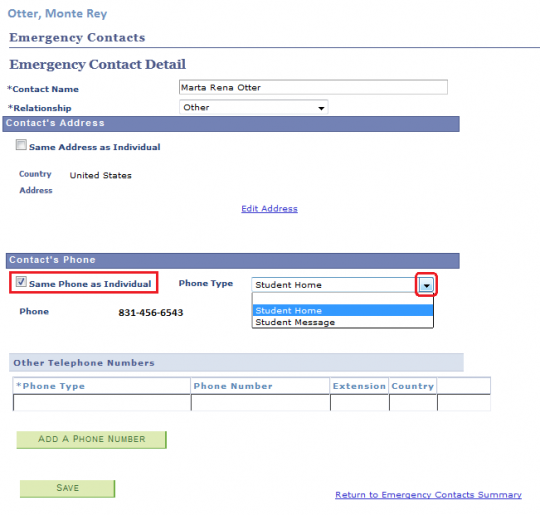
Step 7
If the phone of your emergency contact is the same as yours check the box "Same Phone as Individual" and choose the phone type accordingly from the drop-down menu.
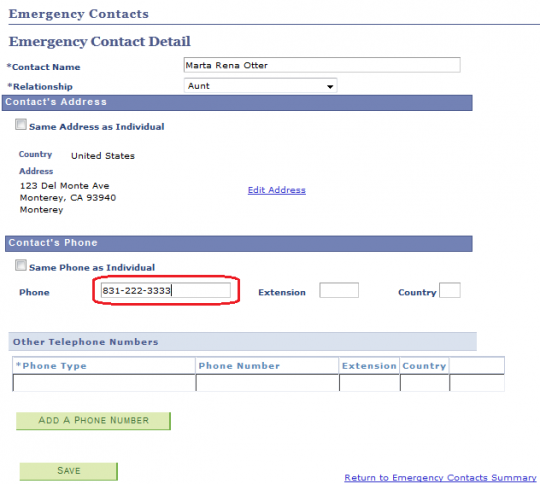
Step 8
If the phone of your emergency contact is NOT the same as yours enter the phone number information.
Step 9
To add another phone number of the emergency contact click the Add A Phone Number button.
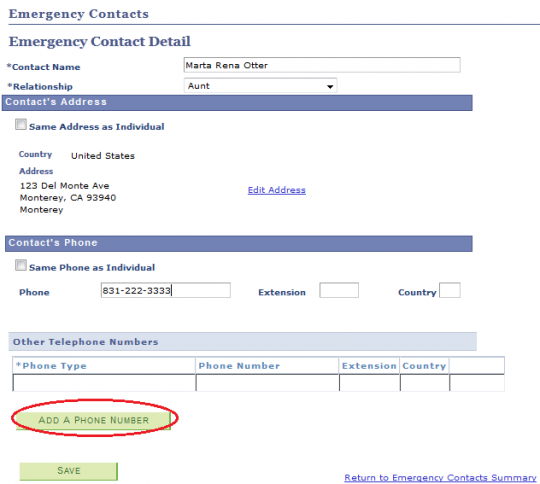
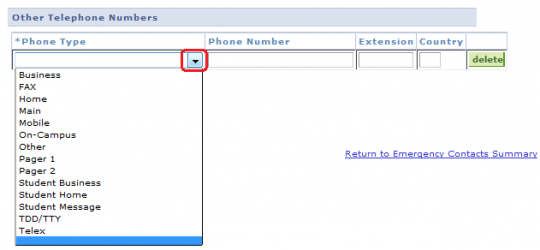
Step 10
Choose the phone type accordingly for the emergency contact from the drop-down menu.
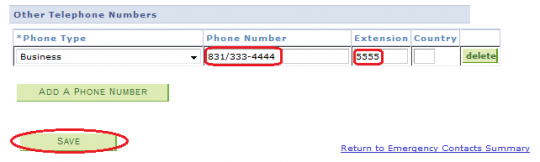
Step 11
Enter the phone number (phone extension if available) for the emergency contact. You can add additional phone numbers if necessary and once done click the Save button to save the information.
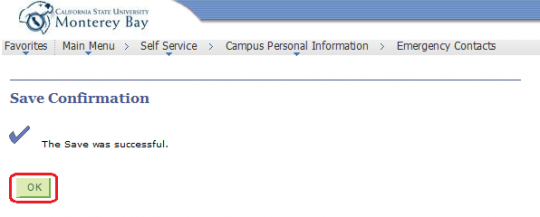
Step 12
Click the OK button to confirm that the information were successfully saved.
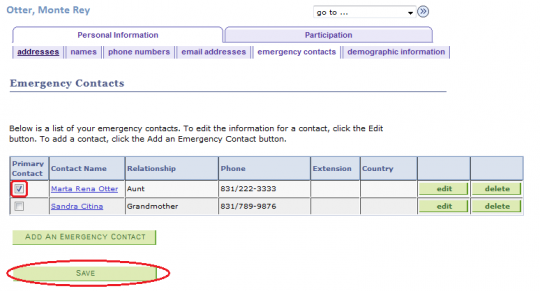
Step 13
Chose the Emergency Primary Contact. (Please Note: The Emergency Primary Contact checkmark is still required to be selected even if there is only one emergency contact). Click the Save button.
Step 14
Click the OK button to confirm that the information were successfully saved.

Step 15
To edit or delete an existing emergency contact click the edit button or the delete button. (Please Note: You cannot delete the primary contact. You must designate a new primary contact before deleting this contact).