Add Classes
Step 1
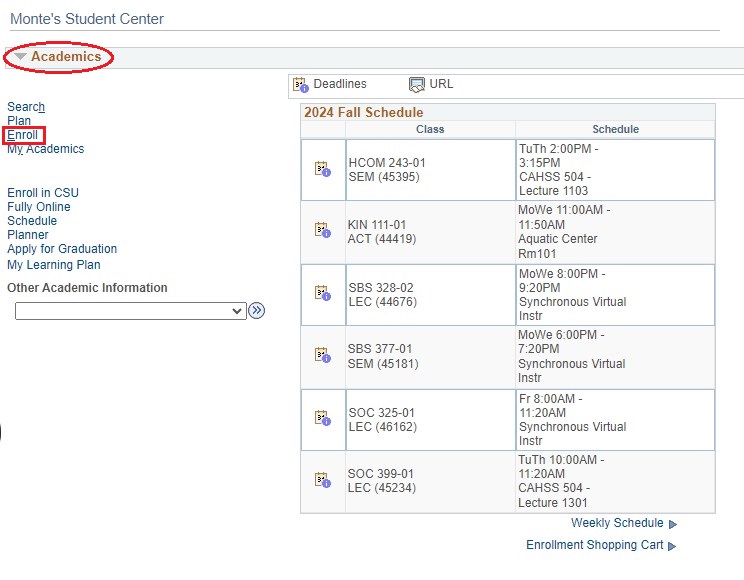
Navigation: Main Menu > Self-service > Student Center > Academic box
Step 2
Select on the Enroll link.
Step 3
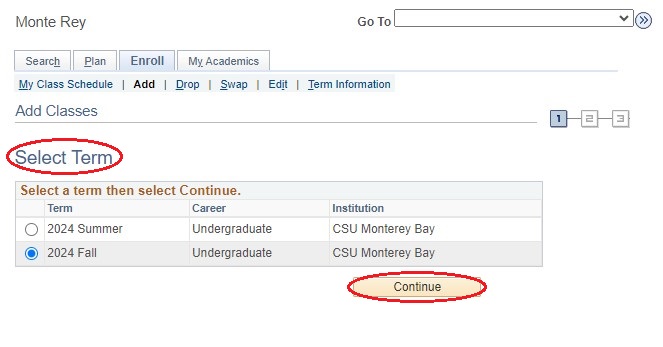
Select a Term and click the green continue button
Step 4
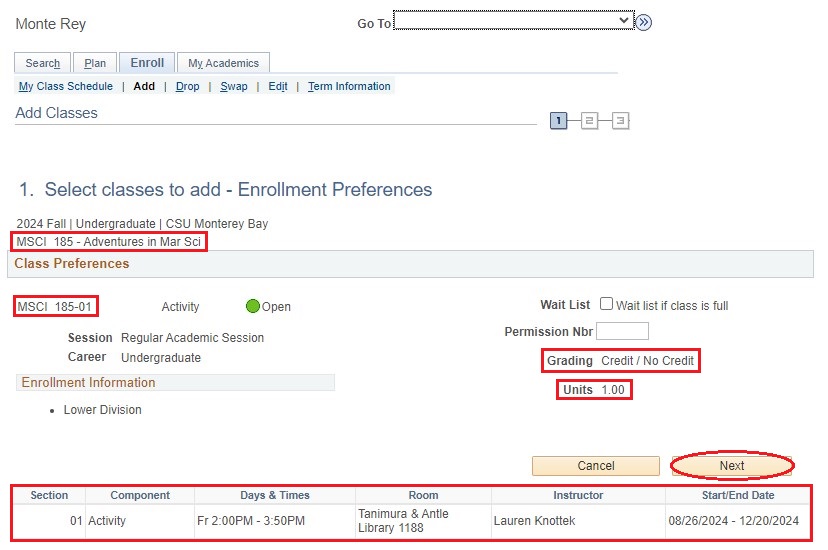
Under the "Select Classes to Add" section:
- Find classes by browsing, searching or entering class number directly (select the most important class first for multiple component classes).
- Verify all course information is correct, enter permission number (if needed), or edit grading basis (if option exists).
- Click the "Next" button to add a class to the shopping cart.
Repeat above steps until all classes are added.
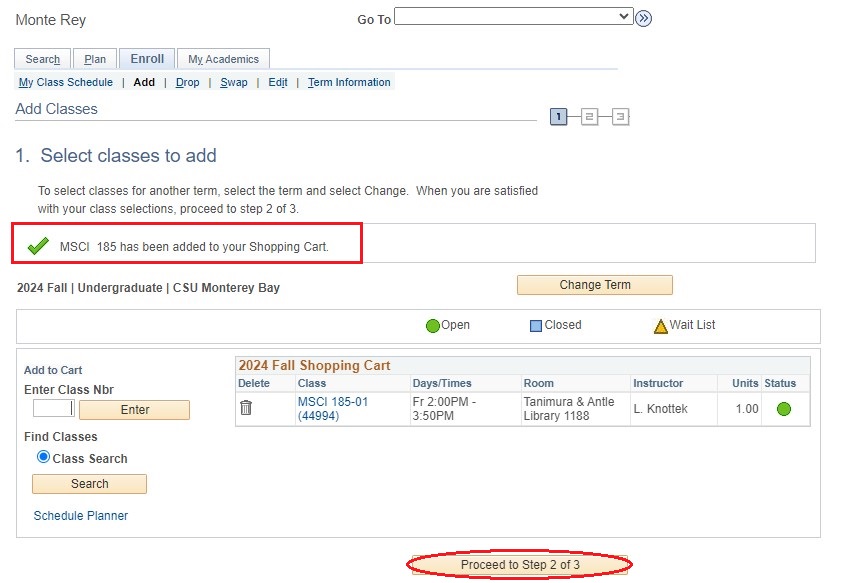
Enter class number directly.
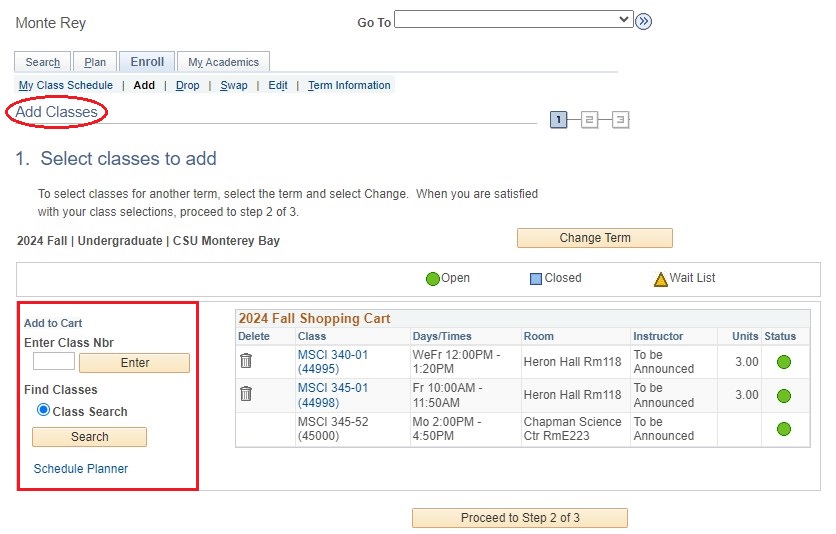
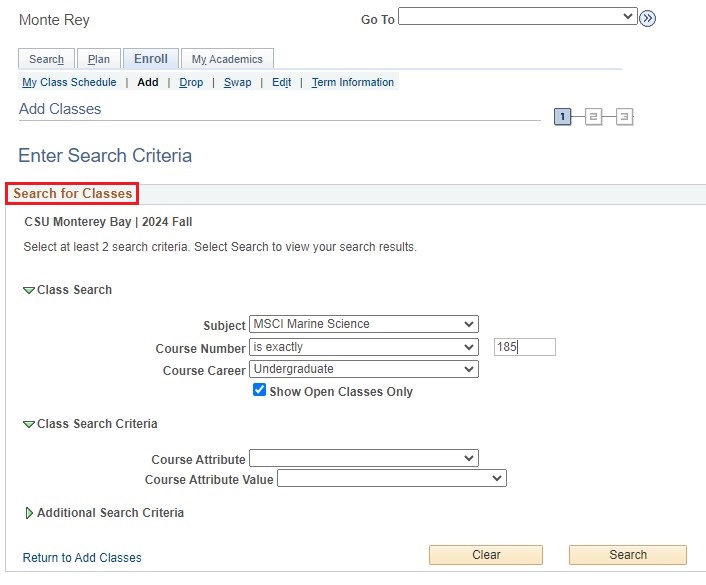
Or, search for classes.
Please Note: To find classes fill out as much information as you have. You can perform this step multiple times.
Verify course information is correct, edit as needed and select the Next button to add courses to your shopping cart.
Verify course has been added to your Shopping Cart and select Proceed to Step 2 of 3 button.
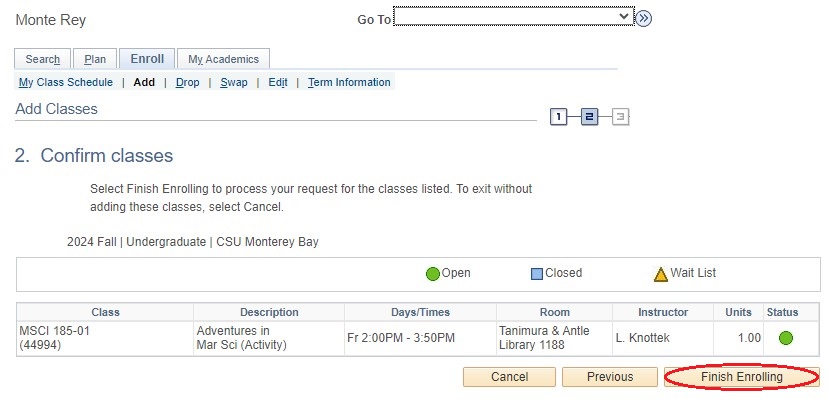
Step 5
Select the Finish Enrolling button to register.
Step 6
View Enrollment Results to see if you were added to the class.
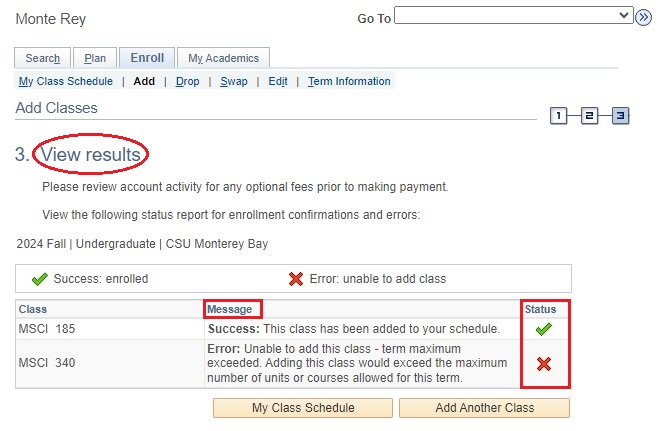
- A green checkmark indicates success.
- A red "X" indicates errors - click "Fix Errors" to return to shopping cart.
- Refer to Registration Holds for details of how to resolve specific holds.
- Review all messages - you may be enrolled but have issues with a specific class.